From Rainbows to Rangers, and everything beyond, Girlguiding offers the best experiences and photography helps us to capture memories and share the story.
Let’s share our adventures, experiences and opportunities, attracting a new generation of girls and volunteers who will continue our guiding family long into the future.
This guide brings Girlguiding’s policies and rules together with some handy tips to help you behind the camera within your unit.
Things you need to know
Never share a photograph that features one or more identifiable individuals when you do not explicitly have consent. If you are not sure of the photo permissions, don’t take a photo showing their face or name.
Remove photographs from your device no later than 14 days after taking them or once they have been used for the intended purpose.
Photographs taken with permission can be stored in an archive.
Obscure (completely blur or cover) or crop-out the faces (and names) of identifiable individuals in photographs, before using or storing, where consent has not been provided.
Always securely store the completed photography consent form.
Check the background! Watch out for “photo-bombers” – particularly faces you do not have photo consent for – anyone that appears to be in a compromised or embarrassing position, and sensitive locations such as toilet doors.
Protect dignity! Never take pictures of people in distress, changing, or sleeping. It’s fine to take a picture of a staged first aid scenario during an activity or training, or someone pretending to be asleep. It’s not cool to photograph real emergencies and incidents.
Job #1: Get permission!
Unit photography is so much easier if you are clear on who can and who can’t be photographed.
Make sure parents have completed the photo consent section of the Starting… form correctly and record their answer on a chart. You should also update GO if required.
If they completed it some time ago you might want to ask them to complete that part of the form again.
Always be clear about why you are taking photos and what they will be used for.
GO sometimes reverts to No Photos when a role is changed or a new role started.
Relax and have fun!
Don’t be afraid of the camera or embarrassed about the pictures you’ve taken. You really don’t need to take it that seriously: relax and experiment. Keep to the default ‘auto’ settings, point, and shoot!
Practice makes perfect.
The great thing about digital cameras, such as those on smartphones, is that you get instant results and you’re not wasting film.
Your camera is fine.
The camera and camera app on smartphones are more than up to the job.
Stop obsessing!
Avoid stressing about getting everything perfect before you take a candid photo. You won’t really have time as children don’t stand still for long! Start taking pictures whilst you are refining the framing and composition, then delete anything you don’t want afterwards.
Engagement
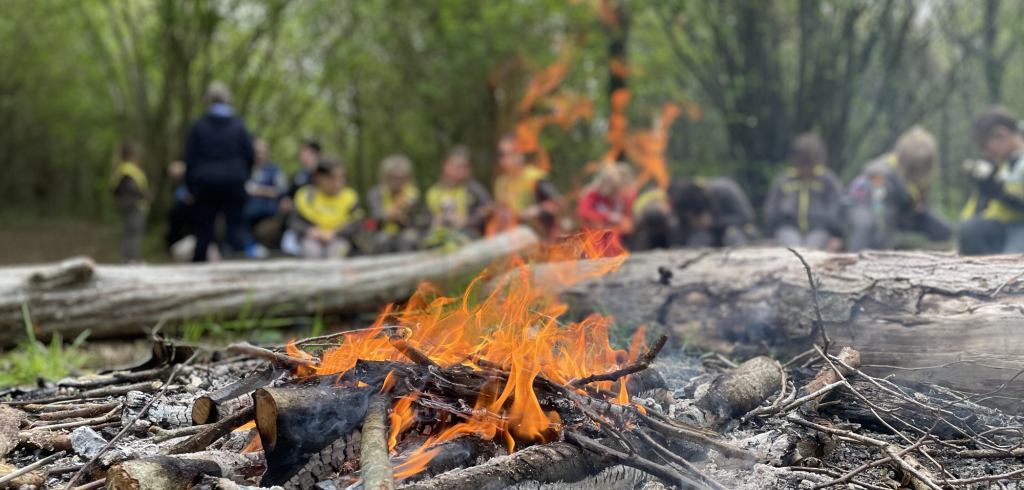
With a single photograph we can tell a story and convey the fun and excitement of an activity, the bond of friendship and the feeling of accomplishment.
So how do you set up such a shot? Well, the trick is, you don’t.
Whilst it might seem temping, in the hustle and bustle of a unit meeting, to call a halt to proceedings and line-up or pose everyone, doing so serves only to interrupt the flow. Natural faces and confidence will melt away leaving only fake smiles and self-conscious subjects.
Don’t fake it, just take it. Get your camera out and have wander around and quietly bag a few candid shots showing young members engaged in an activity before they notice.
Girlguiding photography principles
If you’re not a professional designer or photographer, reading Girlguiding’s policies and pages on photography and branding usage can seem overwhelming.
So long as your photograph shows nothing bad and you have consent for all the faces visible in it, that’s a good place to start. If your photograph is intended for a wider, more public audience, here is a look at Girlguiding’s photography principles.
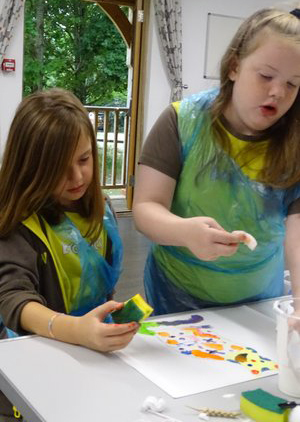
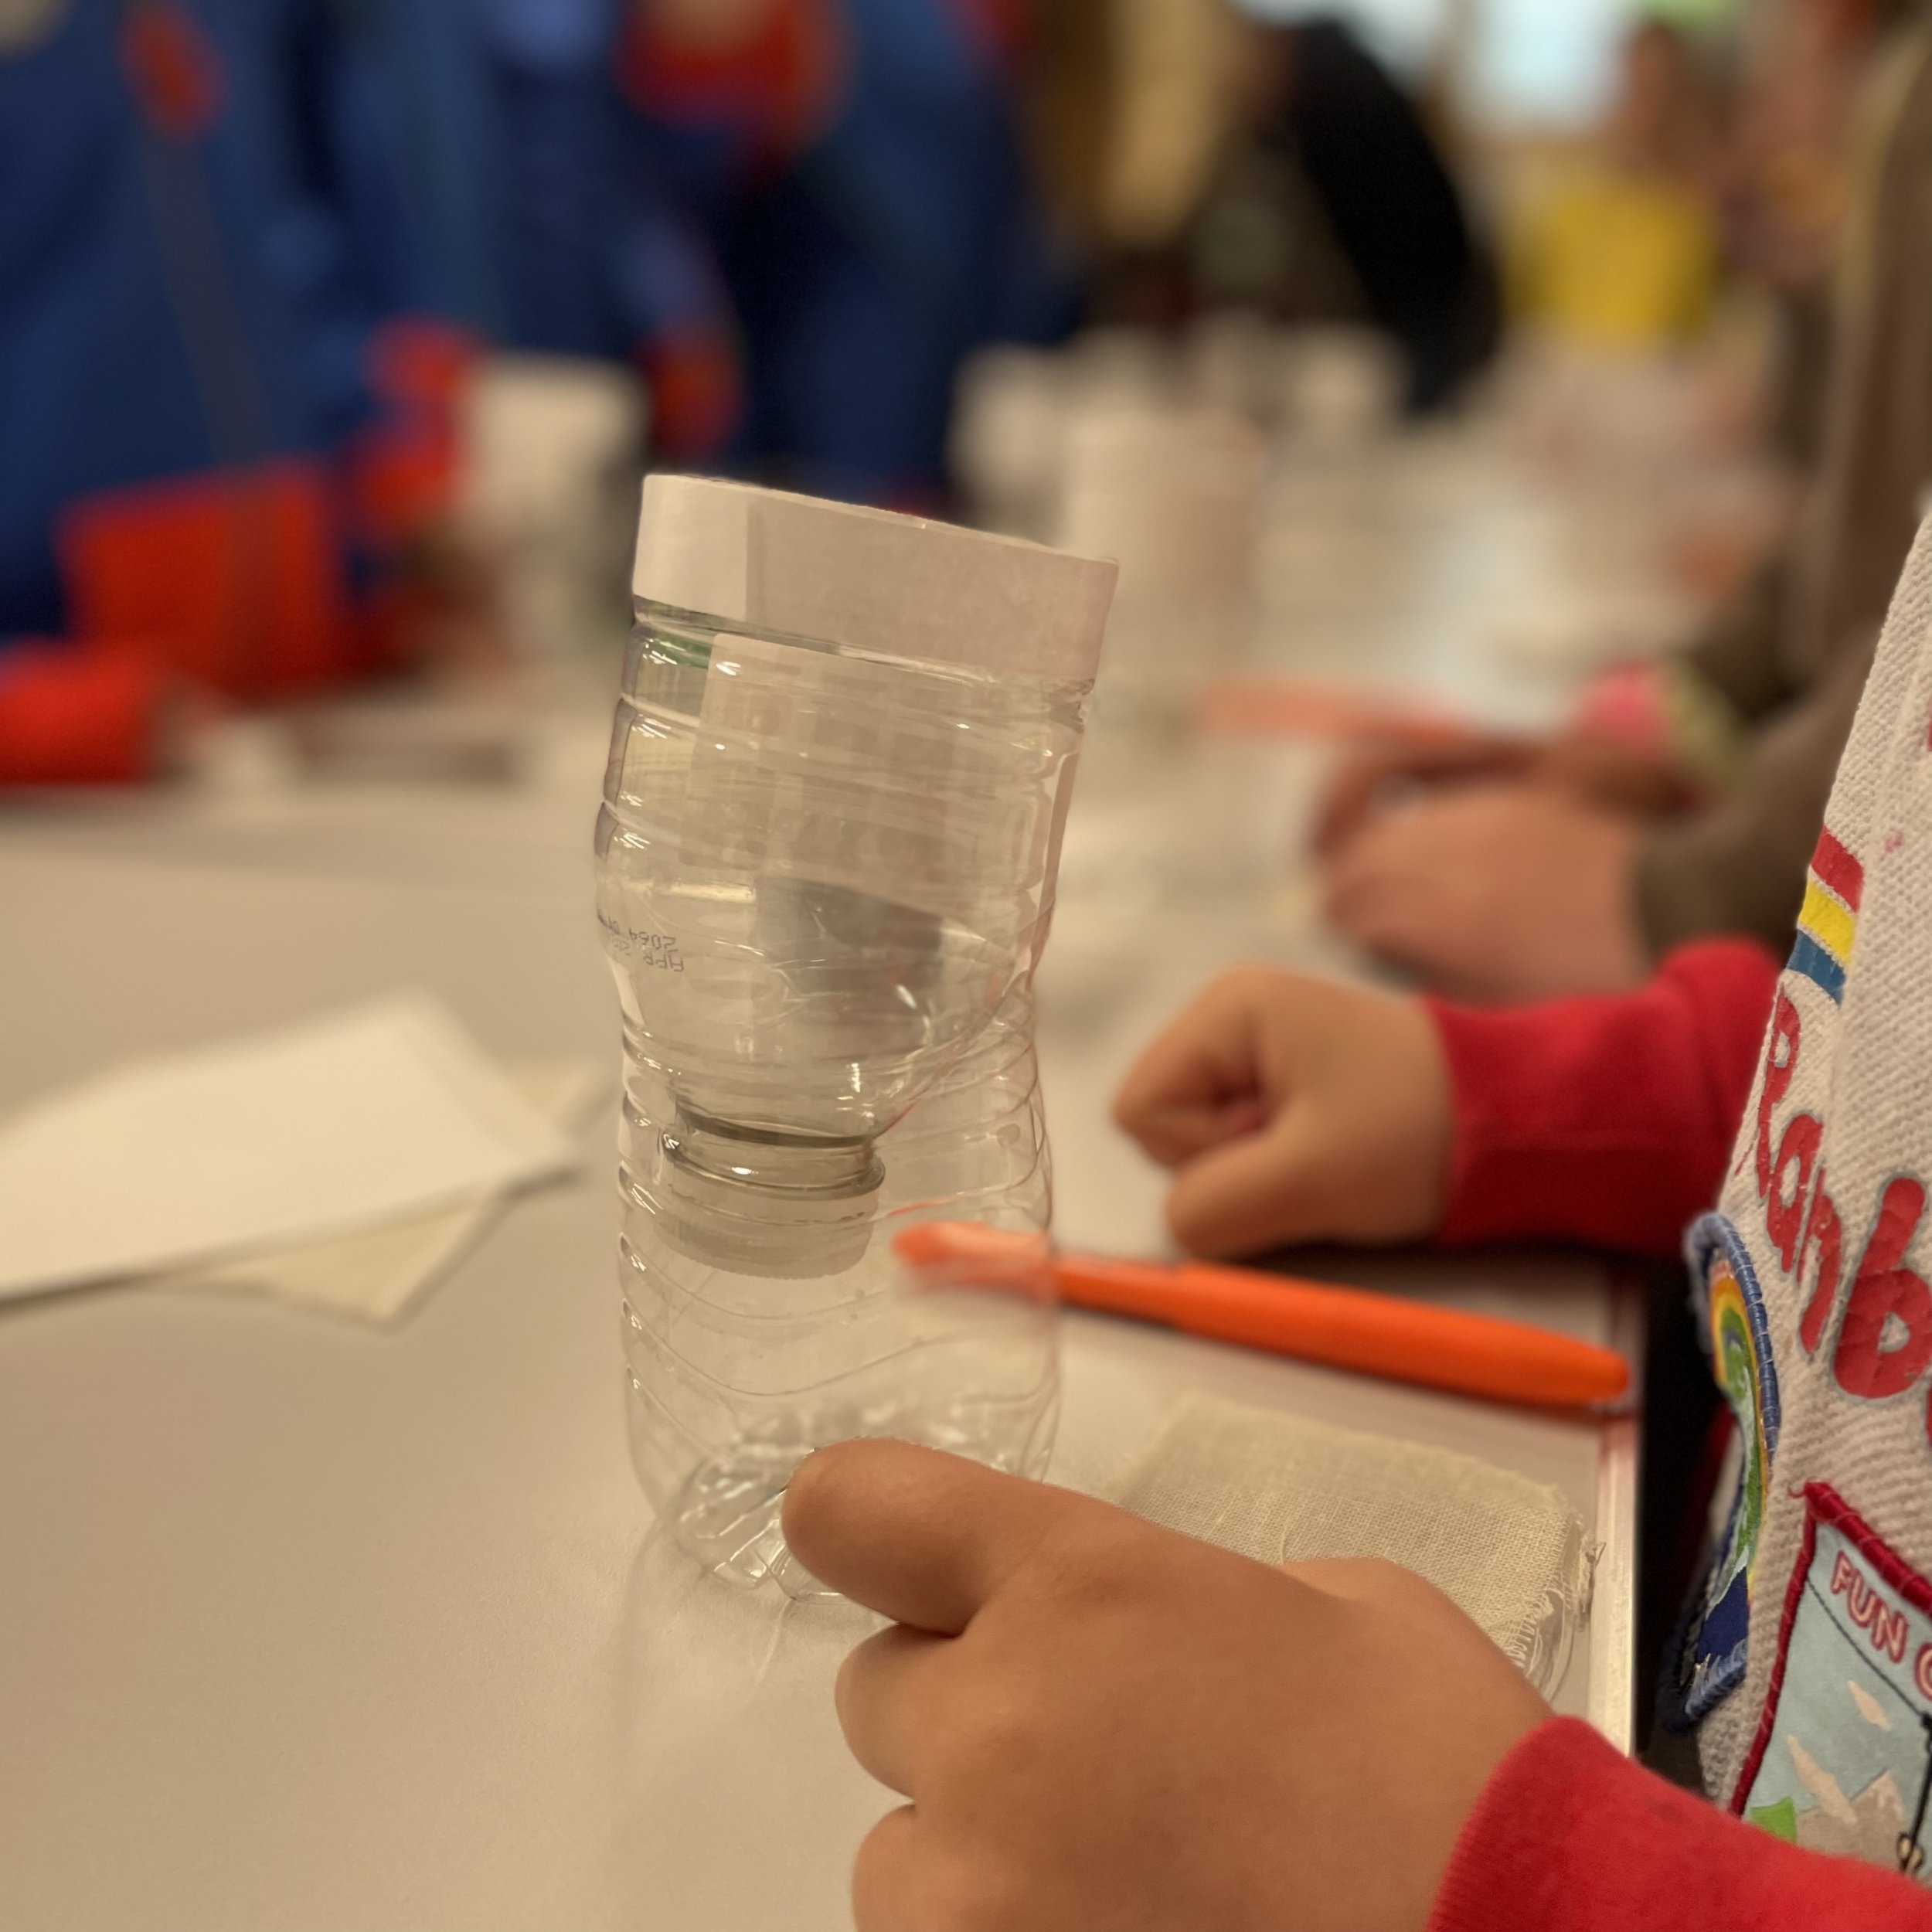
Authentic and natural depiction: as a unit leader taking pictures of your unit, you’ve got this one covered! Capture real guiding in action and avoid staging photographs. Once girls are engaged in an activity, take the opportunity to photograph it.
Photograph girls and volunteers at their level: Get amongst the unit and get a “‘girl’s eye view”. Bring the camera down lower, particularly for Rainbows and Brownies, to their eye level. There’s no need to hand-pick ‘models’ for a shoot. Photograph an actual unit, with groups of friends, and members you already know. This helps you to capture their genuine expressions and responses to activities.
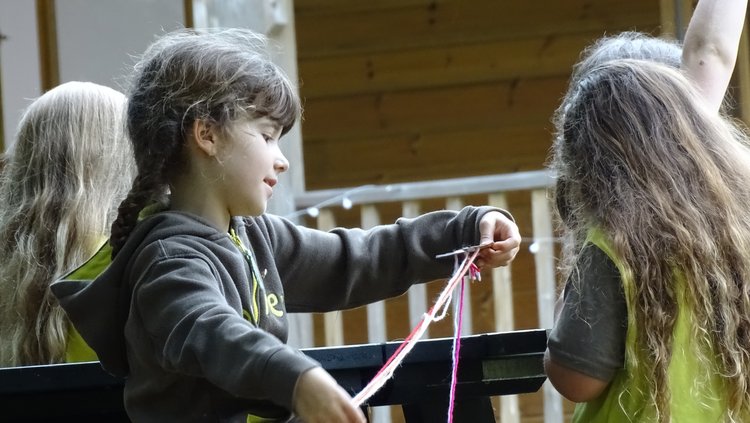
A focal point that catches the viewers’ attention: Our eyes are naturally drawn to action and we naturally focus in on it. We can achieve this with photography too by framing the action – the point of our photograph – and focusing on that. Get closer to (or zoom in to) the action and, if your camera has the feature, use portrait mode to blur the background.
There’s always someone else in the picture: Avoid showing girls on their own. Even if its people in the blurry background, or it’s just a hand, arm or shoulder, frame your picture so that it’s clear someone else was there.
Represent the diversity of the membership: Across your photographs, capture the members of your unit (with photography consent) as equally as possible. This helps you represent the diversity of your unit.
Facing Away
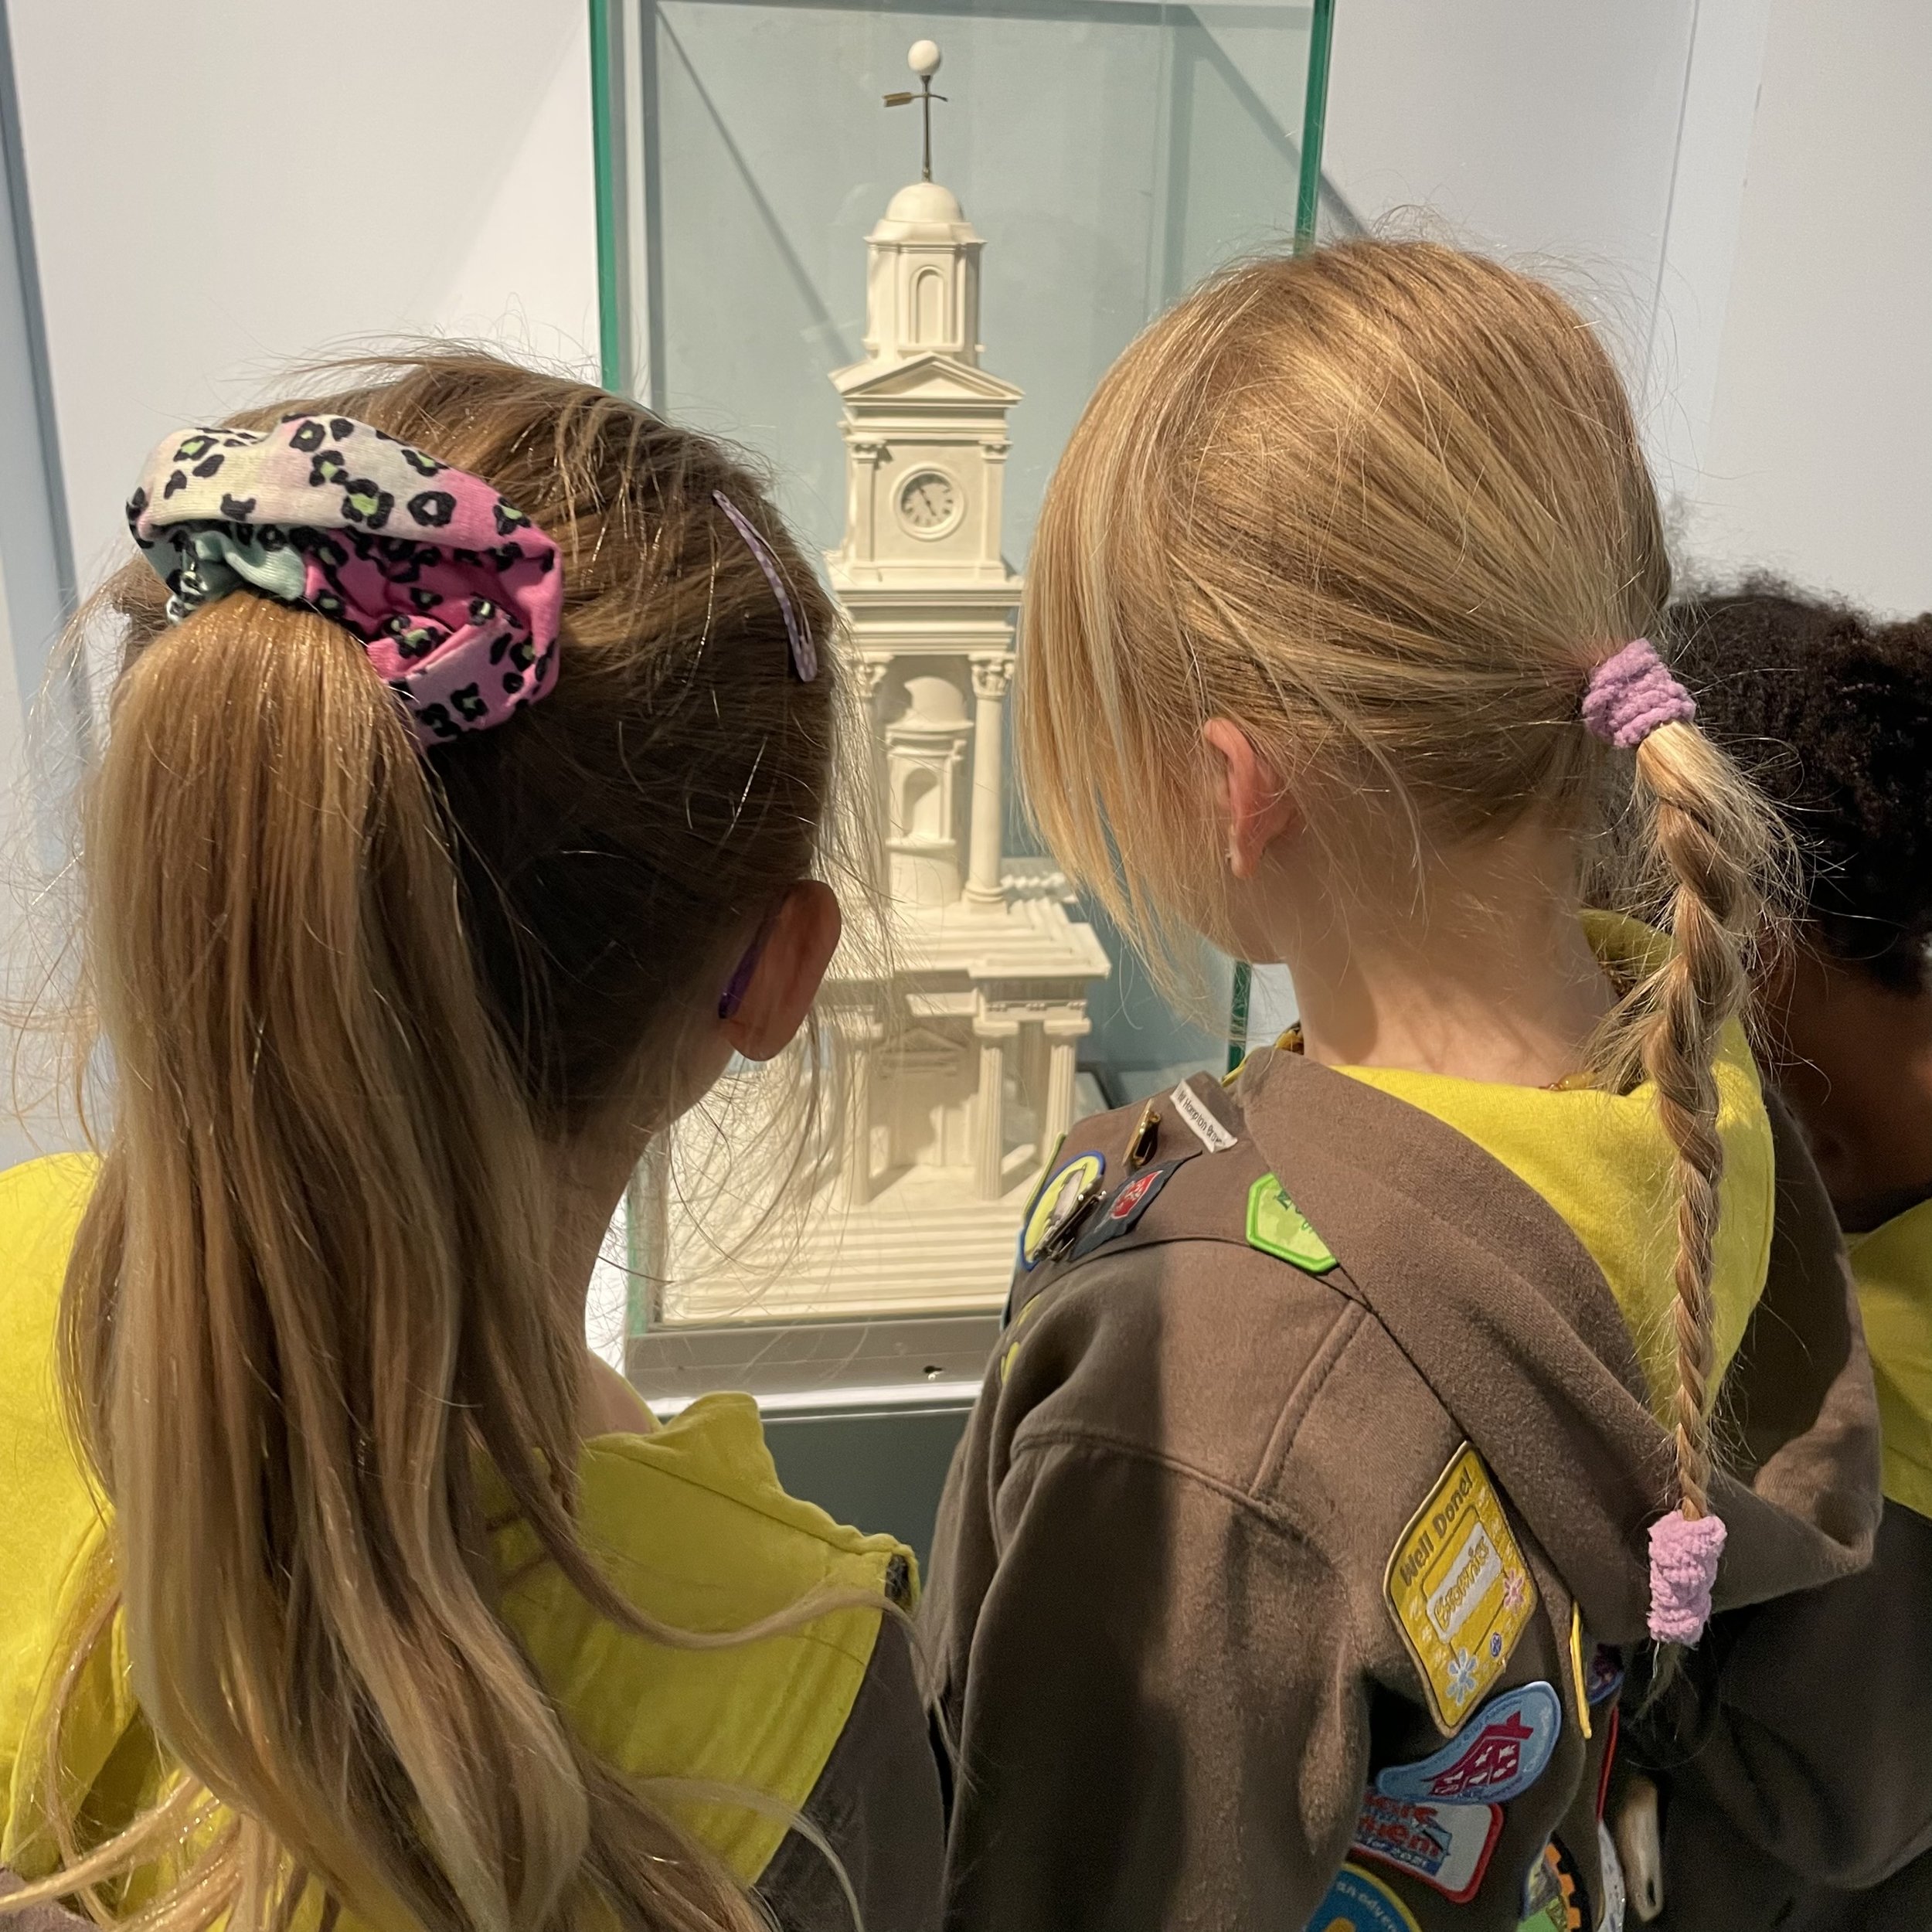
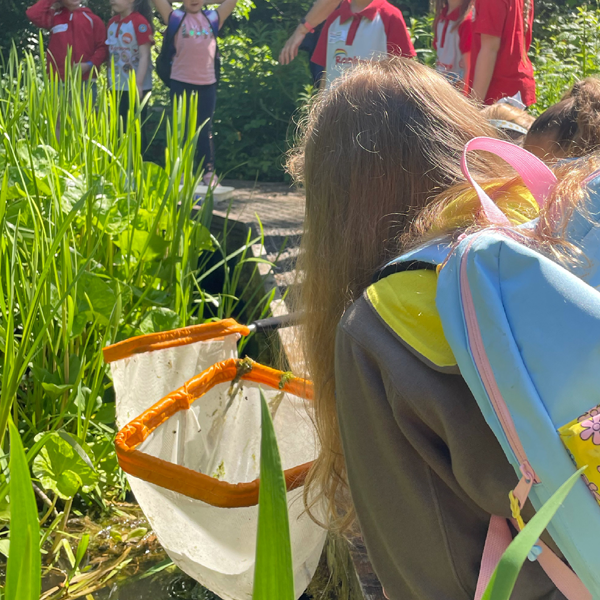
If you do not have permission in place to take an identifiable photograph of an individual or group, there are still some ways you could capture the moment.
Girlguiding uniforms are very distinctive and you can harness this to your advantage.
- Take pictures from behind, with everyone facing away from the camera.
- Aim at the activity with the camera view staying below the chin or over the shoulder.
- Angle the shot so that anyone without photo-consent is hidden behind someone or something else.
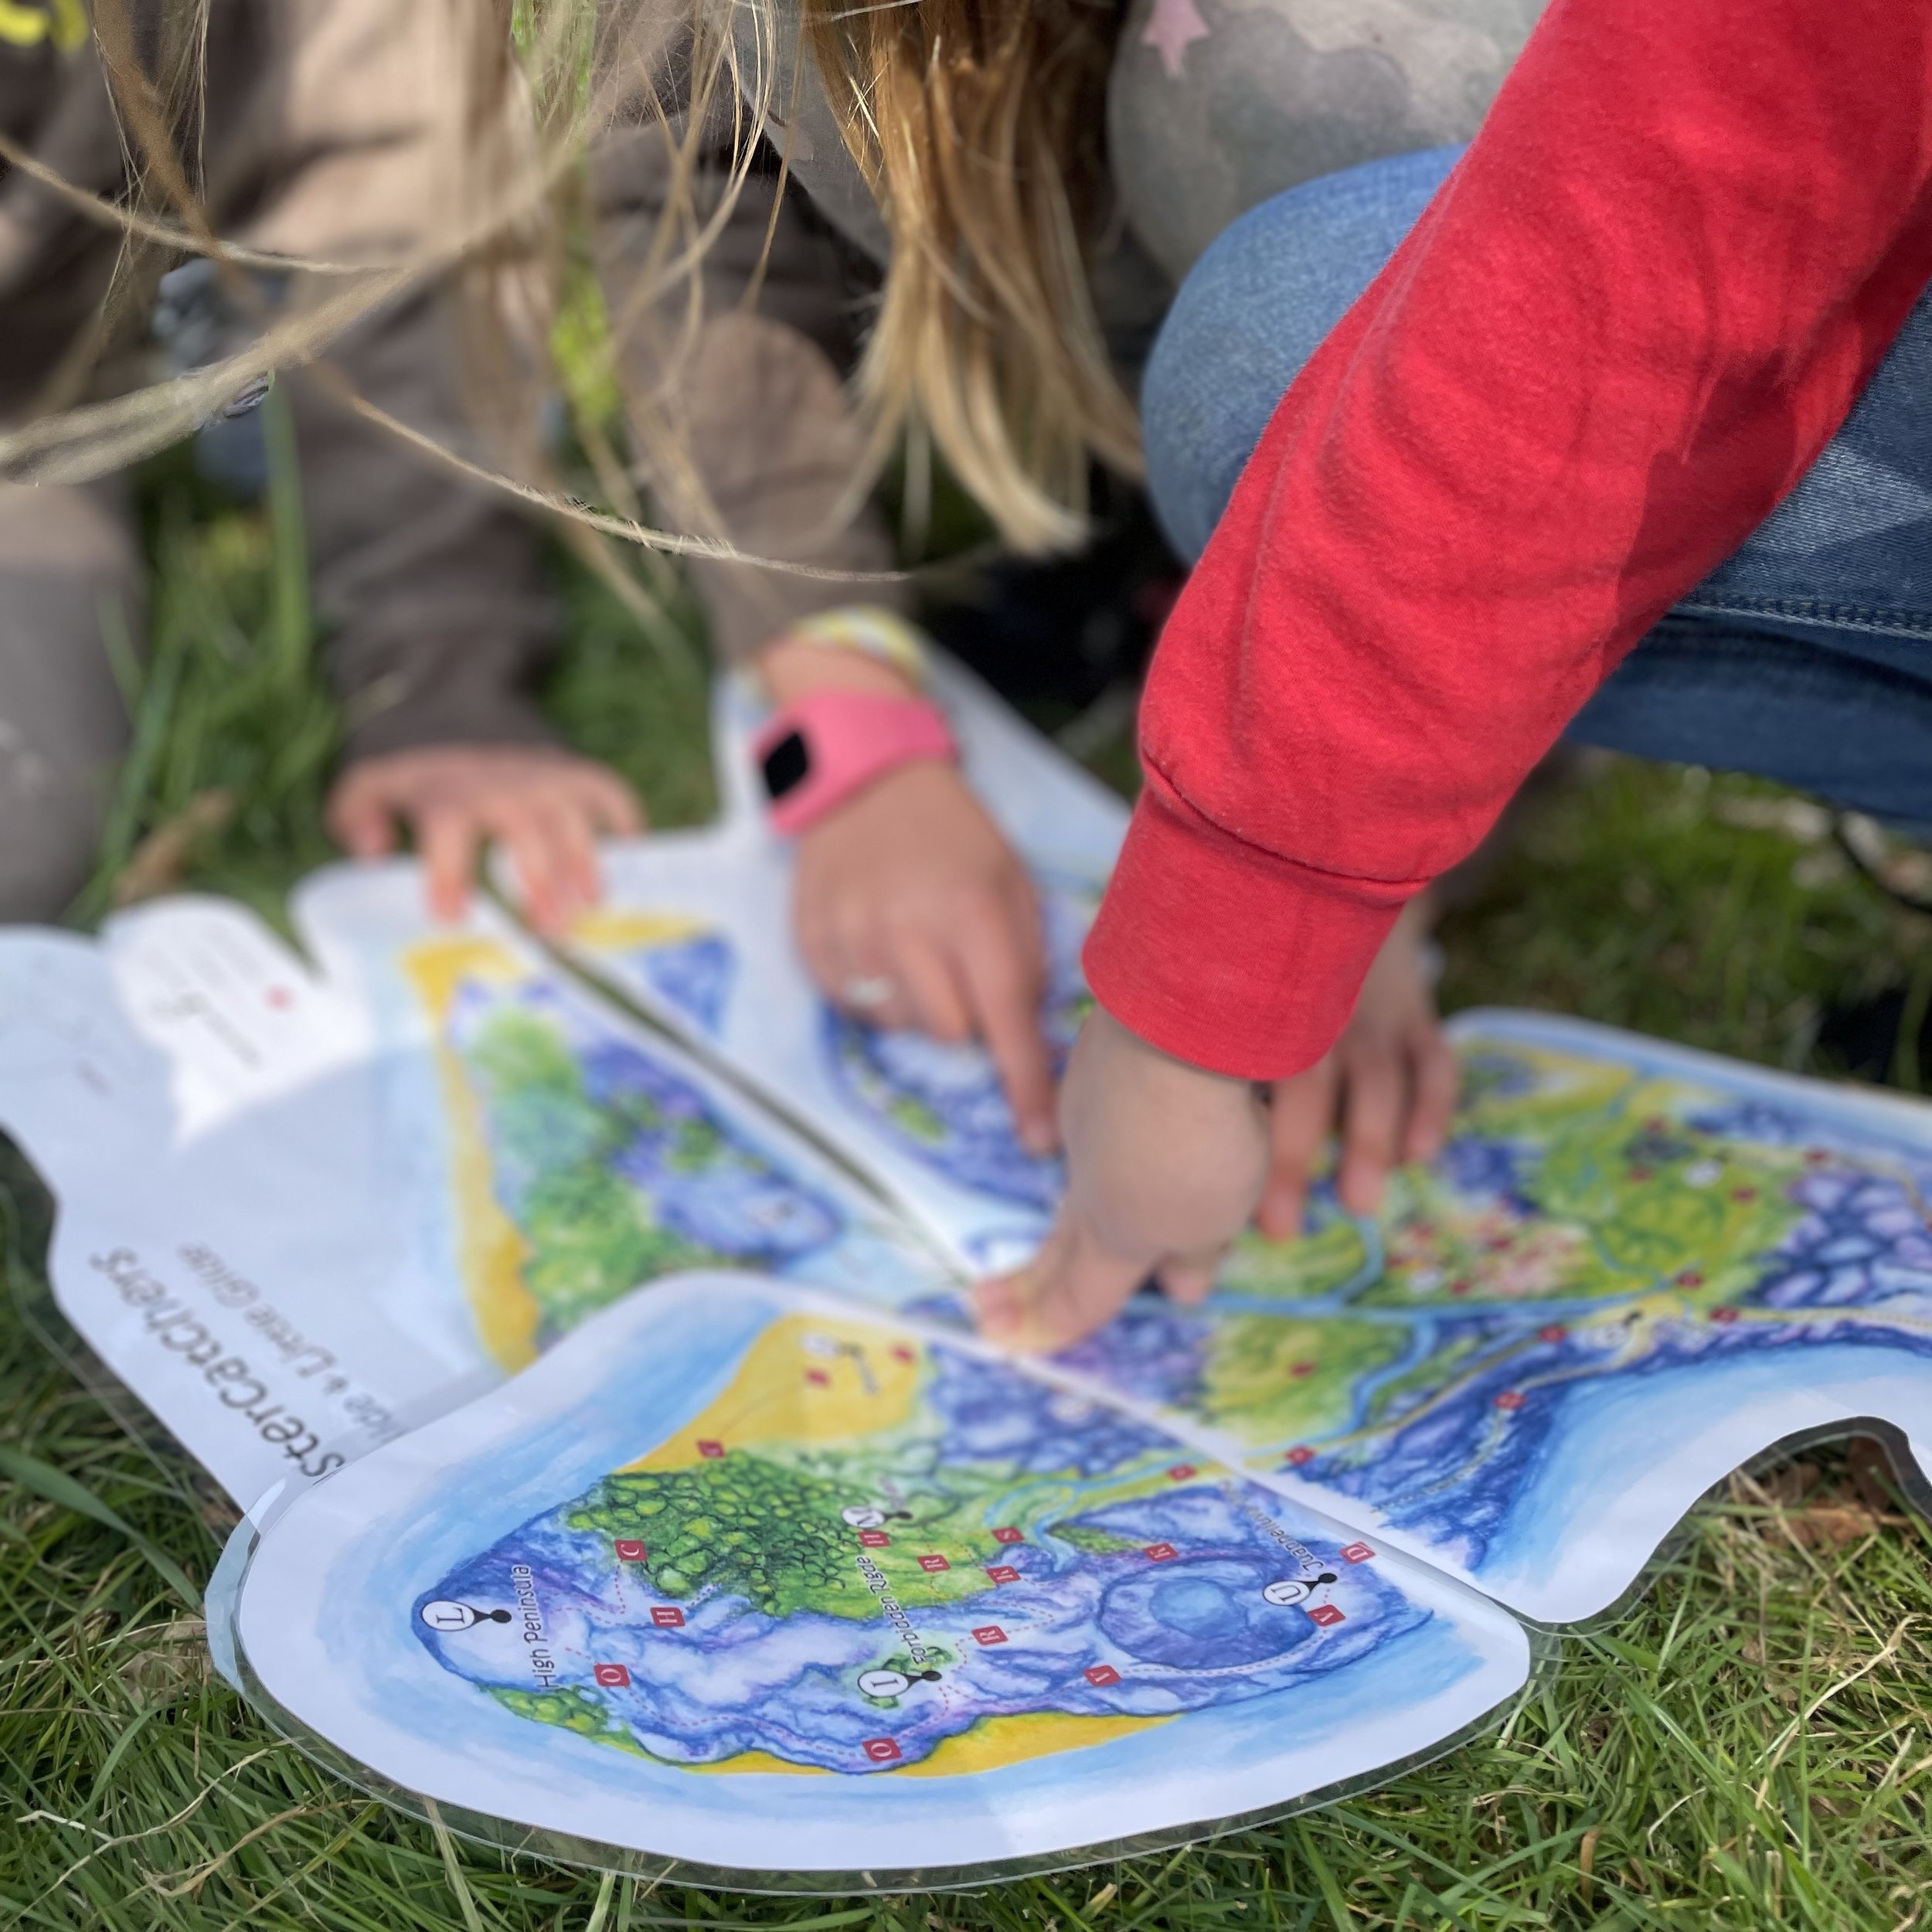
- Use camera focus, “depth of field”, to put girls in the background out of focus. Smartphones often have portrait modes or auto-focus that do this for you.
- Crop out faces of girls you cannot show. You can do this after the photograph has been taken.
- If all else fails, you can cover faces in a photograph with emojis or ‘stickers’.
- Keep an eye out for names on work, badges, bags and clothing, as you don’t want to be able to read these in a photograph!
Special Uses
If you’re taking photographs for your unit or Girlguiding area web site or social media profile keep in mind the shape your picture needs to be.
The cover photo
Usually a wide rectangular picture often found at the top of web pages, as well as Facebook Pages, Groups, and most social media platform bio or profile pages.
If you’ve ever tried to use a taller image as a cover photo and frustratingly found that you can only see a narrow letterbox slice of it, you’ll know where this is going. You’ve taken a great photo but it just doesn’t fit in the cover area shape.
Have this letterbox shape in mind when taking a potential cover photo. Turn the camera or phone on its side, landscape, for a wide shot and position the important bit in a level band across the middle.
Profile photo
Profile pictures are usually square and most are cropped into a perfectly round circle. Aim to keep the subject in the centre area.
If your camera or phone allows, switch to a square before taking the shot. In your head chop off the corners, to make a diamond, and keep everything important within that area.